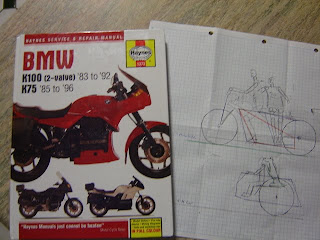
bike frame - base started


Reviewed the plans, looked at them, and realised - "This needs a review from a bike rider", so asked Dave (my stepfather) to look them over.
And found some flaws!! Thank goodness, as if the motorbike was wrong, then the figures would be wrong, which means a rework in the future!
So 20 minutes of review form an expert, has saved me about 20 - 50 hours of work (and rework!!)
So we reworked the plans, in colour pencil.
He also has lent me his manual for his BMW, so I'll be using that for references, to aid construction.
For strength, added a bit of paperclip (the modelers universal useful bit) between the two pieces of brass tube, to add strength , and limit the 'wobble' as I apply a soldering iron to the brass.
seemed to work, so I'll persist with this.
to keep angles consistent, I cut out a guide from a bit of card, used that as a guide - again, simple and effective. Big fan of simple and effective, and will minimise a 'twist' in the frame later.
Joins are a bit scruffy, I'm not fussed, it has a fair degree of strength, and its amazing what sand paper, some putty and a coat of paint can hide!!
So that is the base of the frame, I'll work on the top part later
cheers
PS, just realised that this is turning into a scratch built effort!


Comments
Post a Comment