Groundwork demo test piece pt 1


After watching Richard Windrows demonstrations on how to do groundwork, one of the best things in life is to "Learn and Do'. practice of what I just learnt helps lock in the learning.
First step was to prepare a base. I selected an off cut of wood, scored the surface with my trusty Swiss Army Knife, and covered over the edges with electrical tape to create neat edges. Next time I'll do some groundwork, I'll lay done modelling masking tape, then the electrical tape. Why? The masking tape has low tack, so it wont peel of any varnish, while the the electrical tape has a shiny plastic finish, so the ground work wont stick to it. Plus, with both used, a clean removal of tape is assured. Just a thought to keep in mind.
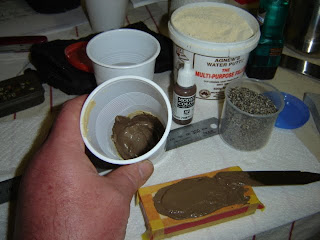
Then I got some wall putty, as a dry powder, added some some small stones to it, added water, stirred till I had a slurry I was happy with. Then I added some paint to it. Adding the paint at this stage (and mixing it in well) means that if any bits are missed at later stages, then we don't have to worry about there being a bright patch being visible after we declare the figure (and the ground work) 'finished!'. Been there, done that, annoying when that happens.
tips; add a darker shade of paint to the groundwork if the medium is very pale. Unless you are going for snow/ ice. Using fine dust adds a visual texture to the groundwork.
tools; plain old artists spatulas, you could also use old spoons and butter knives, if you so desired.
More next post.


Comments
Post a Comment